Winter ONEderland Birthday Party

I recently had the privilege of hosting and celebrating a first birthday with one of the cutest kids I know. I made my way up to Minneapolis last weekend and got to enjoy some good food, but more importantly, spend some time with good friends of mine.

Our theme was Winter ONEderland so our event space was a charming warming house set against the backdrop of a sledding hill and a frozen skating pond. And when I say frozen, I mean it. I think it was a high temperature of 4 degrees that day. Even though it was frigid, the sunlight spilled into our space and we had a warm fireplace to keep us all cozy.

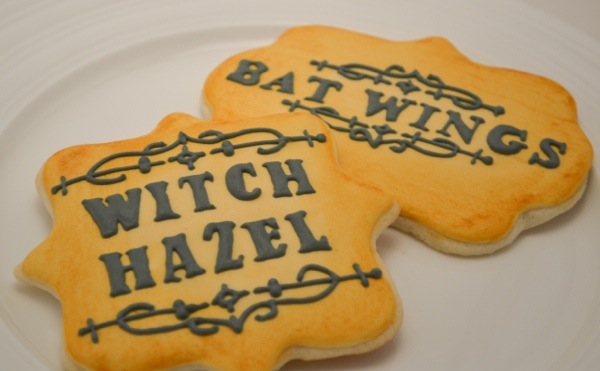
I made sure we had plenty to eat, but more importantly, an incredibly cute printed paper suite and corresponding decorated cookies.

20131215-183012.jpg

On one table we had a coffee and hot cocoa bar along with a custom dessert table.

20131215-182455.jpg

20131215-182555.jpg

These chocolate dipped marshmallows were rolled in toppings like peppermint and toffee. Guests were encouraged to dip them into their drinks to customize them however they liked.

20131215-182617.jpg

20131215-183131.jpg

On a separate table there were kids activities with custom paper mats. There were gingerbread men which they could decorate with frosting and a variety of sprinkles. We also had cute kid friendly foods as well.

Kids Menu
PB&J sandwiches cut into gingerbread men
Mac & Cheese bites
Ham & cheese pinwheels
Rice Krispie treats drizzled with white chocolate

20131215-183932.jpg

20131215-183955.jpg

20131215-184055.jpg

Lastly, I have to show off this custom highchair banner that served as an adorable accompaniment to the birthday girl’s first taste of cake. Such a cutie!

20131215-190343.jpg

20131215-190401.jpg

Day Of The Dead

I wanted to share two things with this blog post. One, I have a really great group of friends that I am so lucky to have in my life and two, some very cute day of the dead sugar skull decorated cookies from yours truly.

So let’s start with the party! The theme was Day of the Dead since it was held on November 1st. The menu included guacamole, mini potato, corn, cilantro and queso fresco cakes, shredded chicken with mole and cilantro lime rice. For dessert we had homemade churros with salted Carmel dipping sauce and of course sugar cookies.

20131102-182217.jpg

20131102-182252.jpg

We had lots of delicious margaritas to drink too!

20131102-182346.jpg

20131102-182402.jpg

20131102-182416.jpg

Here are the cookies I created. Happy November everyone!

20131102-182528.jpg

20131102-182535.jpg

Spooky Apothecary Labels

If you remember from my earlier post, I made a prediction that my new plaque cutters would be making quite a few appearances over the next several months. Well…..I’m happy to announce that I’ve followed through on that promise. Here is a tutorial on spooky Halloween apothecary labels.

I’m introducing a new technique with this cookie design today. I read a few blogs and tutorials on creating the vintage look with cookies and the consensus was that it was difficult to get the right look on the first attempt. I was a bit nervous but figured I would give it a try. I’m happy to announce that they turned out great ( or maybe it was just a fluke?) Either way I encourage you to give this a try!

Ok so here’s what you’ll need:

Juniper green royal icing fitted with a #3 tip
Black icing fitted with a #1 tip
Food safe paint brush
Black gel food color
Small dish with water

The first thing you’ll want to do is outline and flood your plaque cookies with the green icing. Once that’s dried (for at least 2 hours of preferably overnight) you’ll want to get your painting station set up. Make sure it looks something like this:

20131021-200412.jpg

You will first dip your brush in the water. Gently dab any excess off on the paper towel. Dip the edge of the paintbrush in the gel food color and once again dab any excess off on the towel. Start by lightly brushing the edges of the cookie. I usually do half of the cookie at a time to ensure the color doesn’t dry on me.

20131021-200918.jpg

Next take the brush and dip it in the water. Dab it on the towel and start blending. It’s hard to explain so hopefully these pictures will do. In all honesty, just start with large brush strokes and if it looks like too much color on it still, just dip the brush in water, dab on the towel and blend again. It will help remove some of the color so you have more control over it.

20131021-201313.jpg

20131021-201327.jpg

After you’ve let that dry for a while, take your black icing fitted with a #1 tip and do whatever spooky lettering you want. I love the idea of these vintage apothecary labels but you can do whatever you want!

I made two color versions of this cookie. One with a gold flood color and then I antiqued it with an ivory gel color. The greenish cookies were my favorite though. Just mix juniper green gel coloring with some ivory and you can get this moldy green color. Also, did you notice my fingernail polish matches the cookie? Not intentional but kind of an awesome coincidence.

20131021-203017.jpg

20131021-203034.jpg

20131021-203046.jpg

20131021-203102.jpg

20131021-203112.jpg