Well the Farmers Almanac has been proven right again. It said to expect a lot of precipitation in the early months of winter, and wow were they not kidding. We’ve had so much snow this year! Also, don’t mistake that exclamation point for excitement, that is pure frustration. Any snow after Christmas is not welcome in my neighborhood :) I’m thinking I need to take up more winter sports. Does anyone have snowshoes I can borrow?
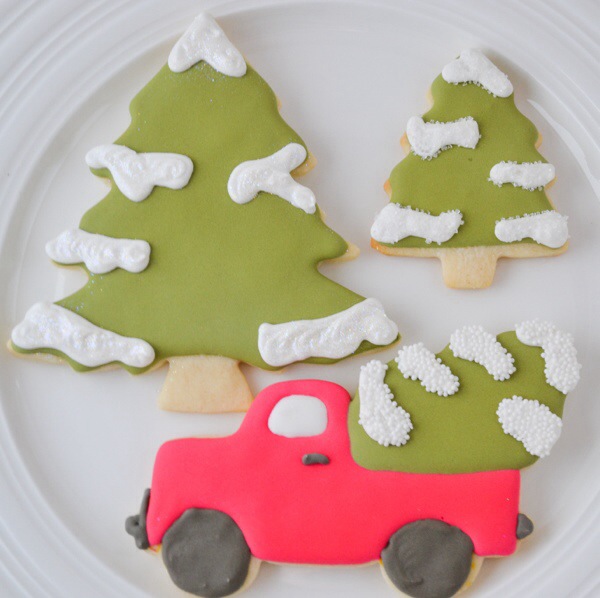
My cookie tutorial today is very fitting for those of us who have been buried under snow for the last few months. It’s a snowy tree how-to and a simple one at that. Enjoy!
Here’s what you’ll need:
tree cookie cutter
juniper green 20 second icing
stiff white icing
#3 piping tip
food safe brush
edible glitter snow (can be found at specialty baking stores)
You’ll want to outline and flood your cookie with a #3 piping tip and green icing first. Let that dry for at least 3 hours before continuing on to the next steps.
Once it’s dried, take your stiff white icing with the #3 tip and add snow wherever you’d like. Practice on parchment first to get the look you want. Once you think you have it, translate that onto your cookie. You’ll immediately want to get your edible glitter and a dry brush to work on the next step. You don’t want your stiff icing to dry!
Dip your dry brush into the glitter, place it directly above the white snow and tap the brush to release the ‘snow’. You’ll get a shimmery result that looks like glistening snow!
I added in a few variations of snow by using white nonpareils as well as white sanding sugar. Good luck with your trees!


